Tag Archives: Chocolate

Bundt Cake: Portland

5 Apr

DSC_0167

Well, call me lazy. I’m embarrassed it’s taken me more than three months since I made this cake to post about it. Perhaps because I had to download all the photos from my phone (there’s got to be a better way…).

For my first-ever Bundt cake, I’m pleased with how this one turned out. I decided on Root Beer Bundt Cake from the Crepes of Wrath, to help send off a coworker. The texture and taste were wonderfully rich and dense, but I might do without the frosting next time. It proved a little too rich with an already rich cake.

Bundt cake ingredients

Standard wet and dry cake ingredients were employed, along with some high-quality, real-sugar root beer (and, wow, could I tell a difference).

Blaine and bundt cake

Blaine, a devotee of Bundt cakes himself (and whose own Baileys Bundt cake photos I’ll post soon), volunteered to help me craft this cake. Here he’s stirring the butter-sugar-cocoa-root beer mixture to melt all the elements before incorporating it with the dry ingredients.

Bundt cake batter

Once cooled a bit, the wet ingredients met the dry ingredients in a lumpy batter that then went into a buttered and floured, nonstick bundt pan.

Beautiful bundt cake

Finally, because I’m always curious about the origins of things, when my mom had mentioned that Bundt cakes became a fad of sorts in the 1960s and 1970s, I looked up a bit of history.

It turns out the Bundt pan is the product of a Minnesota man: H. David Dalquist, a culinary pioneer who developed the signature pan, with its fluted sides and round center, according to a 2005 Associated Press obituary. The company that he and his wife, Dorothy, started in the late 1940s, Nordic Ware, still exists today. And there’s a reason why only Nordic Ware pans carry the “Bundt” in their name: It’s a trademark, hence why the “B” is always capitalized. (For example, this is the one I have, and it’s instead called a “fluted mold cake pan.”)

Though first created in 1950, the pan didn’t catch on until the 1960s, when the Betty Crocker brand of entertaining was taking off and cake-mix cakes were all the rage. My mom remembers a recipe for Harvey Wallbanger cake made with yellow cake mix and Galliano liqueur being passed around, but there are also from-scratch recipes available.

Frosted bundt cake


Here’s a final view of the cake. I only frosted half, and it’s not the most artful frosting, but the cake itself was just the right balance of chocolate and root beer. I’ll be using this recipe again.


Solo Project: Two Cakes

28 Sep

Both of my parents’ birthdays are in September. I never do full-sized cakes, because they often turn out sub-par. I’m much better with cupcakes! However, I made two cakes this last month that turned out beautifully, and I want to share them! 

One was a simple white cake with American Buttercream, for my mother’s 60th birthday. My mom is one hell of an awesome lady, and I wanted to do something really pretty for her! Following this as a model, I made her this cake: 

Image

My dad’s birthday was this last Monday, and he’s a chocolate fiend. Chocolate is better than pure gold, in his eyes. So, naturally, I made a chocolate cake (Martha Stewart’s recipe, of course), with a chocolate ganache as “frosting”. Man, was this thing rich. I swirled the frosting into rosettes, which is something I’d seen on pinterest. I didn’t follow a tutorial or anything – I just kinda went for it. I was really happy with how it turned out.

Image


Happy birthday, Mom and Dad. I love you!

Image

Ice Cream Sandwiches: Portland

11 Jul

DSC_0597

Turns out, trying to bake cookies in 90-degree heat was the most challenging part of this challenge. Well, I didn’t actually do any baking when it was that hot, but the weather certainly delayed my baking efforts for a few days. The Fourth of July was finally cool enough to use the oven (even in my second-floor apartment it was still pretty toasty), so I got to work on reverse Reese’s ice cream sandwiches, with peanut butter cookies and chocolate ice cream. And because I had access to a Cuisinart ice cream maker (thank you, Michael), I decided to try my hand at making my own. Special America bonus: The West Wing was on in the background.

DSC_0615

As cookies go, these were easy to assemble with some brown sugar, butter, eggs and peanut butter…

DSC_0618

…followed by flour, baking soda and baking powder. I did make the dough a few days before I was able to actually bake the cookies, so I froze it, hoping it would keep its consistency. It didn’t, but it turned out pretty much OK in the end. More on that later.

DSC_0635

For the ice cream, I went with Cuisinart’s Simple Chocolate Ice Cream recipe. I thought it best to use a recipe that was 100 percent compatible with the machine I was using. Ingredients: whole milk, whipping cream, white sugar, brown sugar, cocoa powder, vanilla extract. Stir to dissolve sugar and cocoa.

DSC_0658

Once everything was dissolved, I left it in the fridge until the ice cream maker bowl was frozen enough to start mixing. The mixing was its own challenge.

DSC_0662

When it actually came time to bake the cookies, they did not defrost well. There was a lot of crumbling, and the dough didn’t want to hold together. Ideally, I would have chilled the dough for an hour after mixing it, and then it would have rolled out nicely.

DSC_0666

With the traditional peanut butter cookie fork marks, you can see even more evidence of crumbling around the edges.

DSC_0678

But once out of the oven, they held together well. If there’s one thing I’ve learned from baking cookies, it’s to never make them too big, lest they spread out into one giant cookie mess. These were a little more crunchy than I would have preferred for an ice cream sandwich,

DSC_0680

This is how the ice cream turned out: semi-successful. I don’t think my freezer got the machine’s mixing bowl all the way frozen, so the ice cream never thickened as promised. Short on time, I shoved the whole thing in the freezer. The result was better than expected, but still a lot of ice crystals. (Not sure that I’d go to the trouble of making ice cream again, at least not with my freezer’s capabilities.) Eileen had the good idea of mixing it around with a fork like granita, and it definitely had that texture on the top. Once I scooped it, though, and it started melting together, it was a pretty normal consistency: dense, but creamy.

DSC_0690

Here it is all assembled. (Hand model credit goes to Eileen.) Now that it’s getting hot again, these are perfect for cooling down after a long bike ride home from work. The subtle peanut butter cookies and the creamy chocolate ice cream made a tasty combo.

Ice Cream Sandwiches: Denver

21 Jun

Truly not having my finest week, so I’ll keep it brief.


Ice cream sandwiches were delicious! Everyone who tried one enjoyed it, and they were a big hit with my family after a baseball game. Made ’em last weekend.


They were very simple to put together! Sift the dry, blend the wet, bake, fill, and freeze. I wrapped each newly-constructed sandwich in its own foil package, which made unwrapping them feel special. I finished some with sprinkles and some with sanding sugar.


ImageImageImageImageImageImageImageImage

The Great Food Blogger Cookie Swap 2012: Portland

12 Dec

DSC_0290For this year’s cookie swap, I wanted to make a cookie with a technique I hadn’t tried before. Sliced cookies sounded like a good option, as I typically find rolled cookies a little too tedious for big batches, and I haven’t had good luck with the consistency and size of my drop cookies (see last year’s ginger snaps).

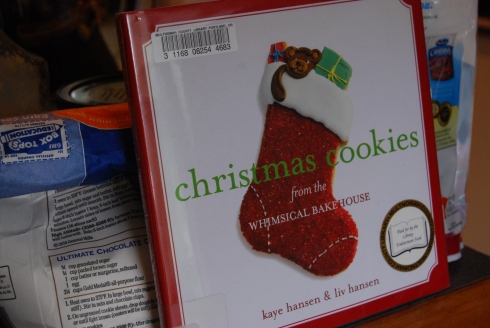
Instead of consulting the Internet for inspiration, as I typically do, I consulted the public library’s cookbook shelf and found “Christmas Cookies from the Whimsical Bakehouse.” This was a great resource for  all sorts of creative recipes, including shortbread snowflakes, spritz cookies and even a 3-D Christmas tree, with chapters on each cookie-making method.

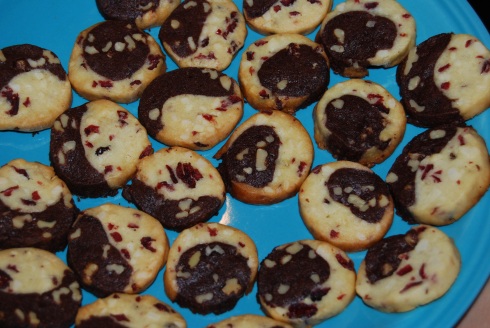
Several cookies caught my eye, but I ultimately decided on a combination cookie with two doughs baked in one: cherry-almond and chocolate-walnut. They’re called yin-yang cookies in the book, but mine really didn’t turn out looking that way (as you’ll see below). The idea is to make to separate doughs, roll them into logs and then roll them together into one log that you slice later.

DSC_0230

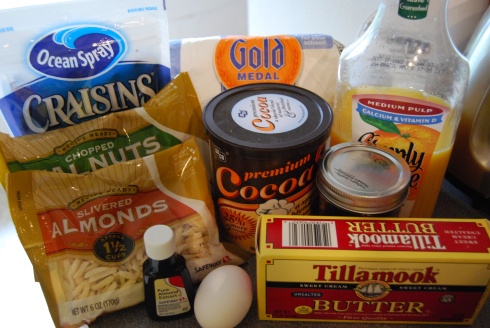
Here’s what went into these combo cookies (note the Tillamook butter). The two doughs were pretty simple, but it did help to have a stand mixer. And a word of warning, this recipe makes a ton of cookies — up to 6 dozen, depending on how big your rolls turn out.

Cherry-almond dough

1 1/2 sticks butter
1 cup powdered sugar
1 large egg
1 Tbsp. orange juice
1/4 tsp. almond extract
1 3/4 cup all-purpose flour
1/2 cup blanched almonds (chopped)

1. Cream butter and sugar.
2. Add egg, orange juice and extract.
3. Add flour, cherries and almonds.

Chocolate-walnut dough

2 sticks butter
1 cup powdered sugar
1/2 tsp. vanilla extract
1 1/3 cup all-purpose flour
1/2 cup cocoa powder
1 cup walnuts (chopped)

1. Cream butter, sugar and extract.
2. Add flour, cocoa and walnuts.

Once both doughs are mixed, make four logs out of each dough and let chill briefly. Combine two logs of each dough so you have four double rolls. Wrap and let these chill overnight (at least 8 hours is best). Cut into 1/4-inch slices and bake for about 10 minutes at 350 degrees until not quite brown.

DSC_0228

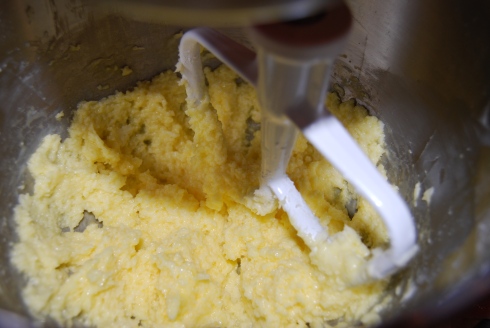
As part of my goal to learn from my previous baking experiences, I’m trying to become more patient when it comes to one of the foundations of baking — waiting until the butter is soft before creaming it with the sugar. And perhaps it helped the consistency of the cookies this time around. (This photo is from early on in the process, so it doesn’t have that silky, pale yellow sheen yet.)

DSC_0253

The cherries (actually cherry juice-infused Craisins, which added an interesting albeit potentially fake flavor) and the almonds looked so lovely chopped up together. In fact, cranberries (or any red berry) remind me a lot of the holidays (and fittingly, Hannah’s cookies had some cranberries, too!).

DSC_0257

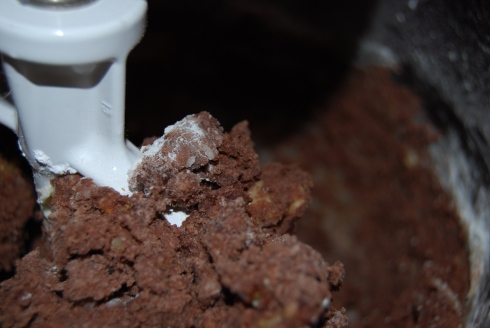
After combining the ingredients for the cherry-almond dough, I mixed the chocolate-walnut separately. I was surprised that this dough didn’t call for an

DSC_0261

Each dough got separated into four logs, so I ended up with eight logs that I needed to roll together into four mega-logs. These were supposed to look like yin-yangs, but the directions didn’t help me that much, so I just opted to see how they turned out.

DSC_0266

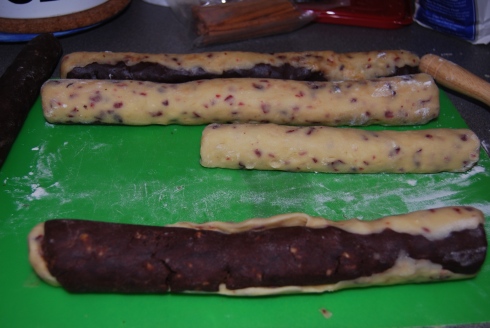
The best thing about roll cookies is that they chill in the refrigerator for a long time, which means the dough is easier to work with and they won’t run into each other while baking.

DSC_0267

When I cut up the logs after a whole night of chilling, they looked a little too much like salami …

DSC_0273

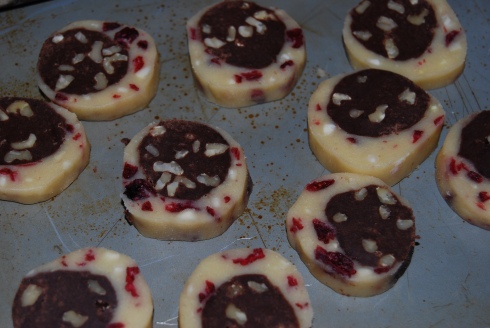
… but they baked up just fine. I had some trouble rolling the chocolate-walnut dough into a cohesive log (and honestly I was surprised this recipe didn’t call for an egg), but they texture incorporated just fine with the cherry-almond when they baked.

I also wasn’t sure if I’d like two cookies in one, or if they were big enough, but I hope the bloggers I sent them to — the Lushers of Life with the Lushers, Vicki of My Purple Kitchen,  Cookie of Cookie Loves and my blog partner, Hannah — enjoyed them.

DSC_0277

Lastly, I have to give a shout-out to the amazing cookies I got from across the country.

First were Hannah’s cranberry-white chocolate shortbread, which looked and tasted wonderful.

Next were white chocolate peanut butter krispies from Mollie of Sprinkles of Life. These had almond bark, peanut butter, mini marshmallows, peanuts and crispy rice cereal. These had great texture and a great combination of flavors.

Third were amaretti cookies, made from almond flour, from Kristin of Nanna’s Cookbook. These seemed so simple, but they looked and tasted elegant.

Last were double chocolate biscotti from Kelley of The Culinary Enthusiast. They went great with my morning tea!

Here’s a photo of all of them together on one plate.

DSC_0309

I ended up having so many cookies (four dozen, plus extras from my batch) that I got to share with my friends and coworkers.

A couple things I’ll try to do next year, though: 1. Use social media better to share my cookie swap experience. 2. Come up with a cute (and safe) way of packaging. Another cookie swap success. I’m excited to do it again next year.

Happy holiday baking!

Challenge #9: Chocolate Espresso Tart

15 Jan

For this challenge, Hannah and I were (surprise, surprise) in the same city, Denver. I went out in January to check out the museums, mountains and mystery of her hometown. We decided because this was a rare opportunity to bake in tandem, we couldn’t pass it up.

I’d gotten Hannah the Martha Stewart “Pies and Tarts” cookbook to complete her trifecta of Martha Stewart baking editions (she also has Cupcakes and Cookies).

We decided to pick something without fresh fruit (not in season) and without booze (heartbreaking, but a bit expensive). We decided on a chocolate espresso tart with ganache and mascarpone cheese.

Check out our next entry, courtesy of Hannah, to see how it turned out.

Chocolate Espresso Tart: Denver

15 Jan

One time, I visited Hannah in Denver, and we made this delicious tart out of Martha Stewart’s new Pies and Tarts book. Here’s a visual journey through the experience. And by the way, the cat hat is tradition.

Great Food Blogger Cookie Swap: Denver

11 Dec

Nora found The Great Food Blogger Cookie Swap last month, and she knew that it would be perfect for Cats and Commas. First, it meant that we were officially declaring ourselves “food bloggers”, which is neat. Also, who doesn’t like cookies?  The idea is simple: we each signed up, as did a ton of other food-blog folk, and Lindsay and Julie would match us to three other bloggers. Nora and I would each pick a cookie recipe (of our own design or adaptation), make three dozen cookies, and send one dozen to each of the names that Lindsay and Julie gave us. Meanwhile, other bloggers would be given our names, and we’d receive three different kinds of cookie. How perfect is that? I’m excited to see what kind of cookies Nora made – we haven’t yet told each other which recipes we used.

The most valuable thing I learned from this experiment was that cookies are delicious. The second-most valuable thing I learned is that Nora and I are scrubs for using blogspot.  Everyone’s blogs are so beautiful and professional! I was very impressed. (We wanted a wordpress blog, but found that we couldn’t get one set up for both of us to post on. If anyone has some advice about this (and also about how to switch the posts we have here onto the hypothetical wordpress), we’d be obliged.)

The first batch of cookies that I received were from Veronica of www.veronicascornucopia.com.  Her cookies were peanut-buttery tasting with mini-snickers baked inside each one. They were chewy, which is how I love cookies, and salty and sweet.  Veronica’s batch came with a sweet postcard, too.

The second batch I got were Dad’s Famous Chocolate and Butterscotch Chip Cookies from Julie M. of www.burntcarrots.com. These were exactly what the name suggests they are: buttery and awesome. They actually reminded me a lot of the chocolate chip cookies that my mom makes, but I love butterscotch chips, so what a wonderful addition.

The last batch I got were from Christian of http://cm-c.org. Her cookies were carrot cake cookies with vanilla bean icing. The texture of these babies was AMAZING, and they tasted just like their namesake. Christian’s cookies also came with a really sweet, long, handwritten note, which I thought was lovely.

The cookies that I made for the swap were Chocolate-Cranberry Biscotti. I love biscotti, and haven’t made it for like 10 years – the last time was definitely with my mom, and I must have been a middle schooler. I adapted a recipe of Miss Martha‘s, of course, because I love her.  Originally, the recipe was Chocolate Pistachio Biscotti with Chocolate Chips from the Martha Stewart’s Cookies cookbook. I changed some of the proportions of dry ingredients and swapped all-purpose flour to whole-wheat, took out her additives and added dried cranberries, and changed the bake times accordingly.  I tripled the below recipe to make three batches.  Recipe is as follows:

-2 C whole-wheat flour, sifted.
-1 C unsweetened cocoa powder, sifted.
-1 tsp baking soda, sifted.
-0.25 tsp salt
-6 tablespoons unsalted butter (room temperature)
-1 cup white sugar
-2 large eggs
-1.5 C dried cranberries

1. Heat the oven to 350. Prep your cookie sheets with parchment or foil.
2. Whisk dry ingredients together. Run them, combined, through a sifter to ensure even baking-soda distribution.
3. Cream butter and sugar until it’s very light and fluffy. Add the eggs one at a time. (A trick I learned from The Simple Art of Perfect Baking is that, when adding eggs or other liquids to creamed butter/sugar, you must beat so thoroughly after each little addition. If your butter mix “curdles” after one egg, whip whip whip whip until it looks normal before adding the next egg. It makes a huge difference.) Look at how beautiful my butter-sugar-egg mixture was after a few minutes of whipping. I could seriously roll around in this.
Image Hosted by ImageShack.us


4. Combine butter/egg/sugar mix with sifted dry ingredients. Mix well, but don’t overdo it. Once they’re combined, add your cranberries and distribute evenly. Your dough may be a little crumbly but should stick to itself fairly well when done.
Image Hosted by ImageShack.us

5. Roll the dough into a ball shape and then into a log. It should be about 10 or so inches long.  Place the log on your cookie sheet, and flatten it slightly. It’ll be about 10-12 inches long and 4-5 inches wide.
Image Hosted by ImageShack.us

6. Bake until slightly firm, about 30 minutes. The cookies will seem fairly soft, but don’t fret! Take the log out and let it cool for 5-10 minutes.
Image Hosted by ImageShack.us

7.  With a very sharp, serrated knife, slice the log diagonally at about 1-inch intervals. This is very crumbly, so it’s best to do it on something that will be easy to clean.
Image Hosted by ImageShack.us

7. Lower oven heat to 300 degrees.

8. Arrange your 1-inch-thick biscottis face-down on your cookie sheet, and return them to your oven. Bake until crisp, but still slightly soft in the center – these puppies will harden like rocks as they cool, so don’t expect them to be biscotti-hard when you test them in the oven.

9. Cool ’em on a wire rack and enjoy!
Image Hosted by ImageShack.us

I packed my cookies up and sent them off to Lisa of http://tequilacupcakes.com, Sara of http://thelittlebite.wordpress.com, and Anita of http://www.confessionsofafoodie.me. Everyone got a dozen biscotti and a little card, too.  I hope my cookies arrived to Lisa, Sara, and Anita in solid pieces, and that they enjoyed them!
Image Hosted by ImageShack.us

Happy holidays! Once Nora gets her Cookie Swap post up and running, I’ll pick the next challenge.

P.S.: Cats and Commas got a twitter! Look at how modern we are. @catsandcommas , holla!

Orange Chocolate Brownie Cookies with M&Ms: Portland

17 Nov

Call me a cookie convert. For the longest time I had eschewed making cookies because I considered them time-intensive and associated them mainly with roll cookies. But drop cookies are awesome, and these are some of the best homemade cookies I’ve ever had.
The orange peel, cocoa powder and M&Ms combine to taste just like a chocolate orange that St. Nicholas used to leave in my stocking every Dec. 6. They’re quite perfect for holiday baking, and they made me feel quite nostalgic.

Here we have our standard wet-dry separation, followed by integration (I’m trying to get better at framing these cooking shots in a more interesting manner, hence the close-ups).

I used an ice cream scoop to form the cookies, and it worked almost perfectly. Though I might make them a bit smaller next time (story of my life). But on the cookie sheet before baking, they looked pretty delicious. And like usual, I saved a bit of the cookie dough for later.


While I waited for these chocolate orange delights to bake into brownie beauties, I took part in my latest entertainment enterprise: watching all 100 movies on AFI’s Top 100 movies list. It’s not that grand of an undertaking, though, as my parents had me watching and appreciating classic movies since I was old enough to stay awake for an entire film.
During this baking experience, I watched “All About Eve,” a drama about an aging actress who befriends a young fan and in the process, struggles with her relationships and career. The plot’s not really the important thing, though; it’s the characters.
After 15 minutes in the oven (and only a little disaster), they’re gooey like a brownie, crunchy like a cookie and taste like Christmas.

Orange Chocolate Brownie Cookies with M&Ms: Denver

13 Nov

This is about to be the shortest and dullest blog post in the history of the world. My camera is broken, and without thinking, I made these cookies while The Boy was at work, so I didn’t have any photo-taking apparatus – and I just didn’t even think about it! There is one picture of the finished product. So….yeah. Sorry about that.

These cookies were ultra simple to make, and turned out DELICIOUSLY. I followed all the instructions, though I gotta tell you: I was suspicious of the melted butter. I thought it was going to make my cookies like hard little rocks. WRONG. They turned out the right mix of chewy and fluffy and crunchy.

I was also almost too lazy to put the orange zest in. I mean, zesting a whole orange? You gotta be kidding me. What am I, some kind of freaking ZEST MACHINE? (Zesting anything is not that hard – I was just having a SUPER lazy day).  I am so glad that I added the zest, though, because the orange-ness was definitely the best part of these cookies. My batter was a bit dry at the end, too, so I juiced the orange and added that in, too. dee-lish,

The cookies turned out very well, and are on their way to the University of Wyoming as we speak. Here’s a picture of the afore-mentioned care package!

Image Hosted by ImageShack.us